|
Getting medication and sometimes food into our cats are important skills. Even if our veterinarians show us how in the office, they often make it seem so easy - but once we get home it's a completely different experience. Here Carolina and I (Laurie) share important information about medicating and assist feeding your cats, and the methods we use to accomplish those feats. It wasn't all roses, and it usually results in some emotional trauma (more for us than our cats!), perhaps a mess to clean up, or a wasted, soggy pill. We all have to start somewhere. Hopefully these tips will make it easier.
Let's get started -
Obviously, the easiest method is to get your cat to eat the pill. For tablets and small capsules, this is the raw feeding equivalent of a pill pocket. Thank you, Carolina, for this tip! Meat Pocket Cut a small piece of meat that is small enough to be bite-sized, but big enough to snip a “pocket” into it with shears (or use a knife if you’re handy with them, I am not). Put pill in pocket, feed to cat - not as part of the meal, you need to ensure kitty eats it. If this method doesn't work, you may need to pill your cat. Medicating with Liquids For liquids, use the same techniques as for pilling. It is still best to follow the medication with water. Pilling Kitty Never pill a plain pill. I always put tablets into a #3 size empty gel cap (example: NOW size 3 empty gelatin capsules), and though it makes it a little slippery, I coat the pill with something, usually a bit of butter. Wet capsules can get stuck in the throat. Pills should NEVER be given alone and dry. Think of your own experience swallowing a pill. It is not just uncomfortable, it can cause physical damage. Strictures are usually not reparable in cats, and over time dry pilling can cause scarring and restriction of the esophagus (to the point a cat must be put on a liquid diet). If you are using your finger or a piller that doesn’t have a water chaser, to prep for giving the pill, have a little dish ready with a bit of something for them to lap up. Bone broth, meat broth (made for the cats with nothing added, just plain broth), “meat juice” if they like that (what separates from meat during thaw), a little tuna water… whatever works for your cat. Once you’ve gotten the pill down, they need to drink something to wash it down! Use praise. LOTS of praise. Before, during, and after. Praise your kitty, tell her what you’re doing and why. Tell her WHAT a good girl she is, how much you love her, and don’t stop talking. Calm, sweet, loving, dotted with lots and lots of praise. The main ingredient is confidence. It takes practice, but it won’t be long before you can approach your kitty wherever she is, hold her head, pop the pill in, and it’s over and done with before she realizes it happened. Take a big deep breath, or a few of them. Think “I can do this!” And just go for it. Worst case, your cat spits the pill out and you must try again. But this does NOT hurt your cat, and you will NOT harm your cat. If you are still nervous, sing, even if you don’t sing. It calms both of you down. Just pick a tune you know, kitty doesn’t care if you sing in key. And sing the stuff you’d talk to her, if you don’t know the words to a song. Kitty doesn’t care if it rhymes or even makes sense. I no longer need to sing to pill, but I do need to sing trying to get a few of them to do other things (like scuffing them into a crate to go to the vet. I have quite a few still semi-feral cats). I usually sing to the Monty Python Lumberjack song. “You’re a kitty cat and you’re ok! You need this pill so you can play and play…” Pilling a Cat - Video demonstration by Carolina Pilling a Cat - Laurie's Method Important notes before we begin: I am right-handed. If your dominant hand is the left, the point is to use your dominant hand for the work (getting the pill in, using the syringe, or swiping the food) and the other hand to control the cat’s movement. You can use a piller rather than your finger. Unlike Carolina who is comfortable with a piller, I’m a spaz with one. I use what I feel in the cat’s mouth wtih my finger to know where the pill is. Yes, the cat usually chomps my finger, but rarely do they break skin. If you use a piller, best to use one with a water chaser as demonstrated by Carolina in the video, above. The Process When putting something in a cat’s mouth, it is their natural reaction to back away. Use this to your advantage. Sit behind your kitty, knees bent, butt on your heels, legs in a V shape. Use this position to “hold” kitty in place. There’s nowhere to back up, and your legs help hold the cat in place. I use my left hand (my non-dominant hand) to hold the head, thumb on top of head, the rest of my hand under the chin, head “cupped” in my hand. You are not hurting your cat: hold firmly! I can manipulate where the head is this way. I have the pill (or if you prefer, a piller) in my right hand (holding the pill with my thumb and index finger). I push the mouth open with my left index finger. Locate the back of the mouth, where the upper and lower jaws hinge together. With your other hand (holding the pill), locate the back of the mouth with your middle finger, so you’re ready with the pill. Hold the head tilted up with your left hand, it makes this easier. I push at the hinge of the jaw, into the mouth, with my left (non-dominant hand) index finger. Push firmly. The mouth will open. (I’m already holding the pill in my right hand in the correct position, at the back of the mouth, ready-to-go). I push the pill in from the right side at the back of the mouth with my right (dominant hand) index finger. I stick my finger in the mouth, guiding the pill ALL the way to the back of the mouth, over the hump of the tongue. I push quickly. Just get it over that hump, you'll feel it. Remove finger immediately. Yes, my finger usually gets chomped. It doesn’t hurt much, skin is rarely broken. I have been using my left hand to prevent the cat from thrashing the head around, and my body and legs hold the cat in position, though there may be some wiggling. As soon as I’ve removed my finger, I hold the mouth closed, and keep the head tilted up (and now your dominant hand is available to help). If you let the head down while pilling, tilt it up again. Holding the mouth closed prevents them from spitting it out, and tilting it up has gravity helping do the work. I hold the mouth closed until they swallow. If they resist swallowing, just stroke the throat gently with your right hand while still holding the head firm with your left. Or you can tilt the head all the way up and blow a gentle puff of air on the nose. As soon as they swallow, you’re done! Praise the heck out of her, and offer the liquid to drink. Assist Feeding IF YOUR CAT IS NOT EATING, IT IS UP TO YOU TO GET ALL THE NUTRITION SHE NEEDS INTO HER. Cats' livers are NOT designed to deal with processing fat stores. Without food, your cat starts to release fat and “eat” her own muscles. This fat can flood the liver causing a liver disease called hepatic lipidosis, or “fatty liver” and this IS life-threatening. It also makes your cat not want to eat, and the primary resolution is food. This is not treatable with a medicine. Food IS the medicine. Assist feeding notes: When to assist feed. As discussed above, a cat not eating can cause liver disease. Overweight cats are particularly at risk. When a cat has not eaten for 24 hours, or only "picked" at food over a 24 hour period, you need to begin assist feeding. Of course, a vet visit is warranted to discover the cause of the problem. Walking away from food is a sign of nausea in cats, and needs to be addressed and managed. But getting the nutrition your kitty needs into her will help support her best health, no matter the cause. It's important to note that without food, cats often develop acidic tummies, and the cycle of nausea perpetuates itself without food. What to assist feed. If you need to assist feed your cat, as your cat is already in distress, it is best to continue to use the food you are currently feeding to minimize GI upset. The exception is kibble. Then we recommend using baby food or plain poached chicken breast. Thus, if you feed raw, continue to use that - though if you feed ground with bone, you will have to make a batch substituting eggshell for bone so you can put the food through the syringe. To use eggshell as the source of calcium, use 1/2 teaspoon (3.1 grams) of very finely ground eggshell powder for each one pound (450g) of meat/organs. If using commercial raw, in the U.S. there may be a Rad Cat distributor near you. This is the only commercial raw that is ideal for a syringe as it uses eggshell, not ground bone. If you want a very plain diet, you can use ground meat balanced with eggshell and taurine (1/32nd tsp of very finely ground eggshell powder per ounce (28.35g); for larger batches, one-half teaspoon per pound (450g), and to one of the syringes each day add 250mg of taurine). This can be done with raw or cooked meat. If you feed homecooked, we recommend you assist feed your homecooked food. Many vets will tell you or encourage you to use prescription food designed to be used in a feeding tube, this makes it easy to use in a syringe. But if your cat has not been on a commercial diet recently, this is likely to cause GI upset, and there really is no need for this. For those new to raw and concerned about using raw when kitty is sick, please read our article Why You SHOULD Feed Your Immune Compromised Cat Raw Food. Having your kitty feel unwell from food simply because it was designed to be used in a syringe makes no sense. The vets that are not anti-raw tell you to keep feeding your cat raw. If YOU feel more comfortable feeding cooked, that's fine. Then cook the food you would feed, just make sure to use eggshell calcium instead of bone. Of course, food made with EZComplete fur Cats works very well in a syringe once prepared for it. When my cats are ill and need to stay at the vet, I take prefilled syringes with raw food, and they assist feed those rather than the canned Rx they would use. And thus my cats don’t get stomach upset from food they are not used to eating. If your vet won’t do that, fill them with baby food. Or poach chicken thigh. By including some fat, this is just as high calorie as the a/d. The a/d has 183 calories per 5.5 ounces, it isn’t a particularly "high calorie" food. Prepare the food for the syringe. If assist feeding raw or homecooked, you’ll have to run it through the blender with some water. If you feed raw with bone, you will have to make food using eggshell as a substitute for ground bone. See above. I use a knife to load the syringe from the top. Carolina uses a spoon. We both prepare as many syringes as we're going to feed in one sitting before we start. How Much Food? For the feeding, start by giving a small amount per plunger push: 1ML to 2ML are good amounts to start with until you get the hang of it. I usually give 3ML in one squirt. For the day. One of the biggest assist feeding mistakes is not getting enough food into your cat. You need to get all of the daily nutrition your cat needs into her. It is best to work up to the full daily quantity by starting with at least half of her daily need on day one. Day two, target three-quarters. On day three, you should start getting her full daily need. If you are unable to get ALL the food your cat needs into her, please get a feeding tube. Feeding tubes save lives and are completely underutilized in cats. They are a quick procedure with a light anesthetic, and usually very well tolerated by cats, and even most sick cats can manage the procedure. You vet is the best judge of how your cat will handle the procedure. Whether for three days or three weeks, feeding tubes reduce the stress on both of you and ensure your cat gets the nutrition she needs. Determining the daily food requirement. As to how much to feed of the course of a day, the math is straightforward. 5ML is one teaspoon of food. Three teaspoons are a tablespoon. So each 15ML syringe is one tablespoon, and that is approximately one half-ounce of food. If your kitty eats 4.5 ounces a day, that means over the course of a day, your cat will need to be fed nine 15ML syringes of food. You can feed one every hour to hour-and-a-half. You can feed two every few hours, and one at the end of the day. You can feed three meals a day of three syringes. Whatever works best with your schedule. Where to Feed. I assist feed in a bathroom. It’s closed, warm, and easy to clean up. And if for some reason the cat gets away from me, I can more easily corral them again. Assist feeding is messy – more so when you’re still new to it. Have lots of paper towels handy! Assist Feeding - Carolina's Method Please note, this video was made before Carolina transitioned her cats to raw food. Now when any of them need assistance eating, Carolina prepares their regular raw food (raw meat + EZComplete fur Cats) to use in the syringe. (I use the same). She uses her Magic Bullet to blend with water into a consistency easy to use in the syringe. I use my small food processor. As food made with EZComplete fur Cats is moist, it doesn't require much water using the Four Paws Easy Feeder syringes featured in the video and discussed here, as you control the width of the tip by where you cut it to create the opening in the cone on the feeder syringe. Carolina found the BEST syringes: Four Paws Easy Feeder. No rubber, so they never stick. Easy to clean. They’re large enough to be useful, but not so large you can’t handle them – and we both have small hands. Best, you cut the syringe tip to the width you want it, which makes syringing raw food SO much easier. The pack comes with one food syringe with a cone shaped feeding tip and one liquid syringe. I cut the long thin part off the liquid one, and thus I get two food syringes. Carolina finds the tip on that to be too thick - and it is a wide opening, so best to use the cone syringe as a beginner. The syringes are 15ML each. That is half an ounce of food. When assist feeding, it is often best to feed more frequent smaller amounts. But it sure is helpful to be able to feed an ounce at a time (two 15ML syringes). The syringes the vet gives you are meant to be used with a feeding tube, and are very limiting both in terms of how much food you can feed (they're usually 10ML at most) at one time, and the opening is very small, so it's difficult to get food through it. In this video, Carolina demonstrates how to assist feed using a cat bag. This works to settle and calm the cats, reducing the stress of assist feeding. It also restrains the cat, so you are free to use both hands. It is stressful to assist feed a struggling cat. ...Though as we've found, you may find that after a few meals, your cat realizes she feels better, and settles down (often after initially objecting just on principle). But this is Carolina's first time assist feeding Lucky (though Carolina was already experienced with assist feeding when this video was made). My Lazlo was the first cat I ever had to assist feed, and at first, of course, he hated it and fought it. But as I got better at it, and he realized he felt better with food in his tummy, he quickly became cooperative and purred throughout - as you can see Lucky is almost enjoying her food, here. Carolina and I think it's important to note: while this is the first time Lucky was assist fed, she is calm and not struggling. Our cats are so sensitive to us, if we approach it with fear and trepidation, we can expect them to object. Approaching it calmly, with love, gentleness and confidence, they respond, as Lucky does. Assist Feeding - Laurie's Method The instructions for assist feeding are exactly the same as pilling, only you’re not putting a pill in the mouth, you’re putting the tip of a feeding syringe. And instead of aiming for the throat, tilt the head up with your left hand, so it’s easy to point the tip of the syringe at the roof of the mouth. By pointing at the roof of the mouth, you can be sure you’re not going to make your cat accidentally inhale food. Finger Swiping This can be used for small amounts of food, but it isn’t very efficient. I use this to get slippery elm bark powder “paste” into my CKD cat. I used to use the slippery elm “syrup,” which seems to work much better for nausea than straight slippery elm bark powder. But now I’ve a CKD cat that needs this basically daily, I find it easier to just finger swipe a paste into his mouth – and by replacing water with the George’s Distilled Aloe Vera Juice (now labeled “drink”), he needs less of the paste to be as effective as 3ML to 5ML of the syrup. The usual directions for the paste are one-quarter teaspoon of slippery elm bark powder and one-half teaspoon of water. Stir and let thicken. But now I replace the water with George’s Aloe – and he doesn’t need all of it. I’ve reduced it to 1/8th tsp slippery elm bark powder and one-quarter teaspoon of George’s aloe vera. Have the paste handy. Follow the instructions for pilling, only rather than holding a pill to put in the mouth, you’re putting a blob of aloe paste on the end of your dominant hand finger. Rather than push a pill all the way into the back of the mouth, you're just “wiping” the paste into the back of the mouth. Open her mouth with the index finger of the hand holding the head as instructed in the pilling section above, and quickly wipe that blob of paste (or food) that's on your other finger into the back of the mouth. No need to push it anywhere. Close the mouth with the left hand, hold the head tilted up, wait for kitty to swallow. Repeat as necessary to get most (or even all) of it in. If you only need the smaller amount paste to help your kitty’s nausea, you should be able to get it done in one or two swipes.
0 Comments
Most of you must recognize the word "Kefir" from the milk/yogurt aisles in the supermarket.... But do you know what Kefir is? The word Kefir derives from the Turkish word keyif, which means "Feeling Good" , and it's believed to be original from the Caucasus Mountains. Its history is full of legends, and can be "traced" all the way to the Prophet Mohamed and mentioned by Marco Polo! It is also believed Kefir was used as a way to preserve milk by means of fermentation, in the absence of refrigeration and pasteurization. Kefir grains were added to milk, generally in a goat skin leather bag, and hung by the door. Everyone who went by or through the door, shook the bag with its foot. After 24 hours, the fermented milk was poured, and fresh milk was added to the grains, keeping the fermentation process constant. 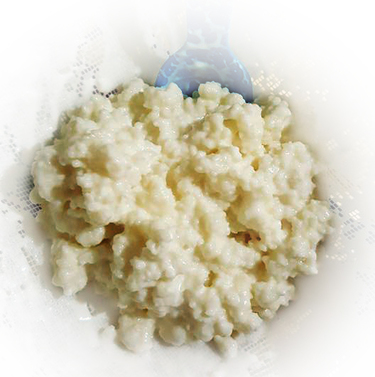
But just what are the Milk Kefir Grains?
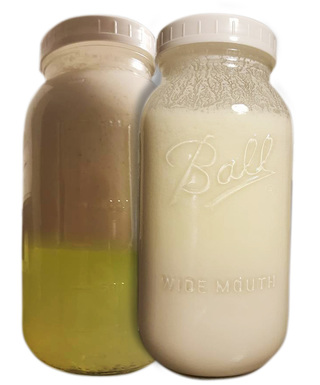
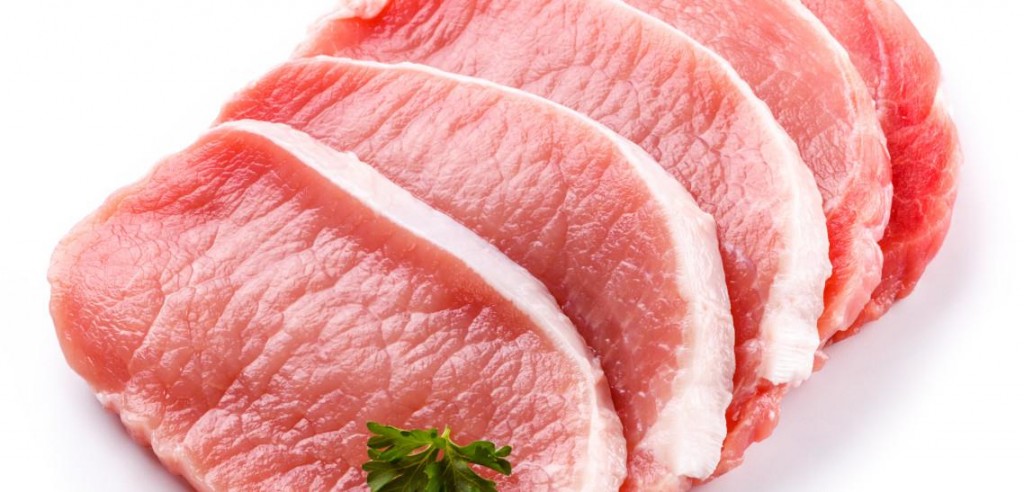
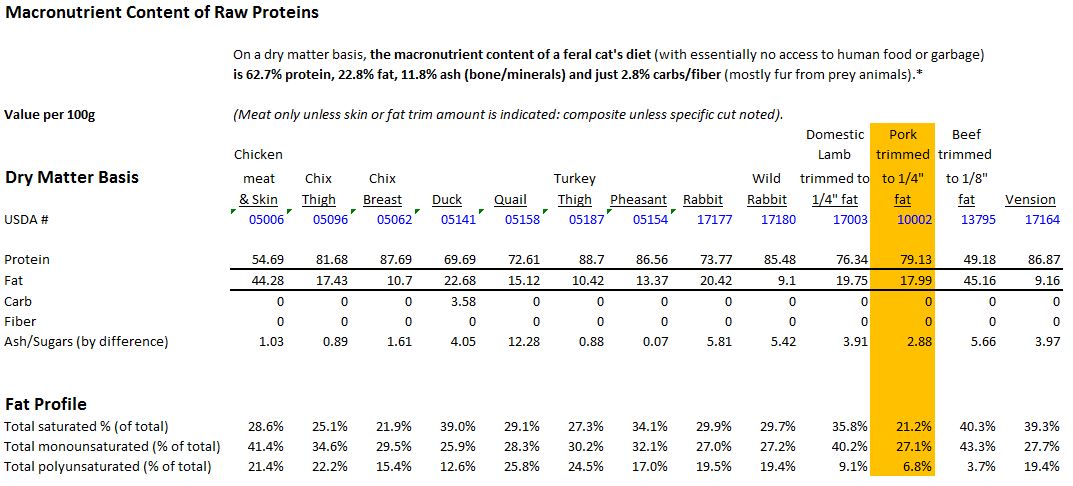
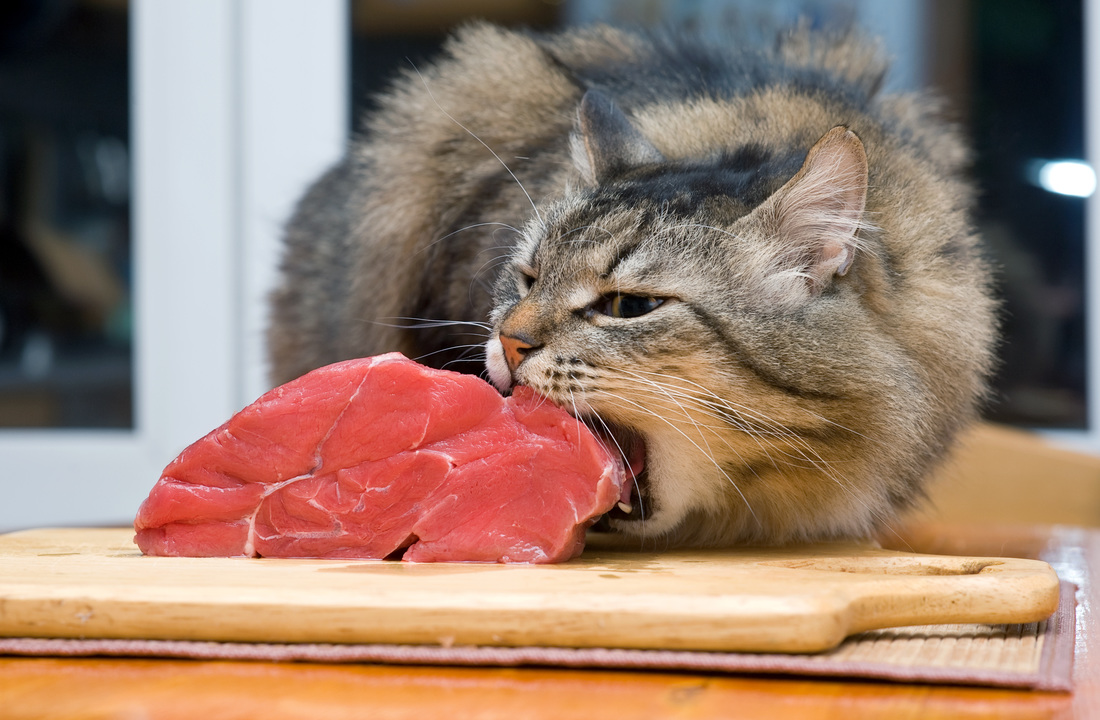
Kefir grains are microbially derived protein and polysaccharide matrices that contain cultures of bacteria and yeast that are essential to Kefir fermentation. The bacteria found in the grains depend of several factors, including the Milk used during fermentation, the fermentation process itself, and even the region where the grains originate from. Mainly comprised of Lactobacillus, common bacteria strains include: Ref 1, Ref 2, Ref3 Lactobacillus acidophilus, Lactobacillus brevis, Lactobacillus casei, Lactobacillus delbrueckii subsp. bulgaricus Lactobacillus delbrueckii subsp. delbrueckii, Lactobacillus delbrueckii subsp. lactis, Lactobacillus helveticus, Lactobacillus kefiranofaciens subsp. kefiranofaciens, Lactobacillus kefiri, Lactobacillus paracasei subsp. paracasei, Lactobacillus plantarum, Lactobacillus rhamnosus, Lactobacillus sake, Lactococcus lactis subsp. cremoris, Lactococcus lactis subsp. lactis, Lactococcus lactis, Leuconostoc mesenteroides subsp. cremoris, Leuconostoc mesenteroides subsp. dextranicum, Leuconostoc mesenteroides subsp. mesenteroides Pseudomonas, Pseudomonas fluorescens, Pseudomonas putida, Streptococcus thermophilus Yeast Strains: Candida humilis, Candida Kefyr, Kazachstania unispora, Kazachstania exigua, Kluyveromyces siamensis, Kluyveromyces lactis, Kluyveromyces marxianus, Saccharomyces cerevisiae, Saccharomyces martiniae, Saccharomyces unisporus, Debaryomyces hansenii, Dekkera anomala, Torulaspora delbrueckii, Pichia fermentans, Saccharomyces turicensis, Issatchenkia orientalis and Debaryomyces occidentalis. Depending on what milk you use and on the quality of the Kefir grains, Kefir can contain anywhere from 1 billion to 10 billion CFU of bacterial/yeast probiotic per ml (cc). That is 5-50 billion CFU per TSP! It is important to note that Kefir grains, unlike the name suggests, are very much alive, and as such must be taken care of.... As any alive being, it must be fed - but what does it eat? That is the beauty of it: LACTOSE! In kefir, lactic acid bacteria are primarily responsible for the conversion of the lactose present in milk into lactic acid, which results in a pH decrease and milk preservation. Other kefir microbial constituents include lactose-fermenting yeasts that produce ethanol and CO2. Non-lactose fermenting yeast and acetic acid bacteria also participate in the process. After each fermentation "batch", the grains biomass increase in about 5-7%, which is why the bacterial/yeast composition varies according to the milk and process used for fermentation. Unlike the original days, the methods used to produce Kefir at home today differ in several ways. Of course no one is leaving a goat skin bag full of milk by the door to be pounded at, for one! Today Kefir is mostly made in glass jars, kept out of the sunlight to preserve the most amount of vitamins as possible. With that, comes one issue - The grains only feed what they can touch. While some will instruct to pour the milk over the grain in a jar, loosely cover it with a cheese cloth or a plastic lid, put the jar in the cabinet and forget about it for the next 24 hours, I beg it differ. By gently mixing the Kefir every so often you are making sure the grains are evenly distributed, therefore more lactose will be consumed, achieving a more thoroughly fermentation process. This is specially important for cats, which are mostly lactose intolerant. Another way of decreasing the amount of lactose is by doing what is called a "double fermentation" - you simply strain the Kefir after 24 hours into a clean jar, this time closing the lid, and place it into a dark cabinet for another 12-18 hours. The whey will completely separate from the curd, but a smooth texture can be achieved by using a blender. Not only Kefir is virtually lactose free, but studies show that Kefir can actually actually improve lactose digestion and tolerance overtime. The benefits are countless - not only Kefir is a powerful, natural, live probiotic, but it also: In multiple studies, consumption of kefir or kefiran in an animal model has been associated with an increase in microbes thought of as beneficial, such as Lactobacillus and Bifidobacterium, while simultaneously decreasing harmful microbial species such as Clostridium perfringens (1, 2), Reduces the severity of Giardia , inhibits the adherence of Salmonella typhimurium and E. coli, 1, 2, 3. Kefir has shown a multitude of antibacterial and anti-fungal activities and has been tested in disk diffusion experiments against a wide range of pathogenic bacterial and fungal species, found to have antimicrobial activity equal to ampicillin, azithromycin, ceftriaxone, amoxicillin, and ketoconazole (Cevikbas et al., 1994; Yüksekdağ et al., 2004; Rodrigues et al., 2005; Huseini et al., 2012). Kefir also has anti-inflammatory and healing properties, and was effective in postoperative treatments and in patients with gastrointestinal disorders. Several studies have shown Kefir to have anti-carcinogenic effects 1, 2, 3, and can also act as an anti-oxidant. But one of the major ways probiotic products such as kefir are able to produce health benefits is through the modulation of the gastrointestinal immune system. Kefir has shown in studies anti-allergenic and anti-asthma properties, is capable of decreasing the levels of blood glucose, improving the symptoms of constipation, among many other health benefits. It's important to note that the quality of traditional kefir is mainly influenced by the microorganisms present in kefir grains and kefir processing conditions. Although scientists and food companies attempted to develop a commercial “kefir-type” beverage produced by different cultures and mesophilic and thermophilic lactic acid bacteria, or even pure cultures isolated from kefir grains, their success when compared to traditional kefir is limited. It is suggested that this limitation is due to the microbial diversity present in kefir grains and their interactions, which can determine the probiotic and therapeutic properties of final product, as well as peculiarities conferred by certain minority groups present in different grains. How do you acquire Kefir Grains? Kefir grains are passed on from friends or family, or can also be bought online in sites such as Amazon. When consuming Kefir, you are drinking history! Think about it - you can't just create those grains out of nowhere.... They have been passed around from one person to another, until that they got to you! And the beauty of it? Every time someone used a different milk, a different processing method, temperature, etc - the microbioma in the grain has changed! You will notice that once you start making kefir on a regular basis, your grains will start multiplying exponentially - that's why they are passed around. What else can you do with them? You can eat them - they are just about the most potent probiotic you can get your hands on! Feeding Kefir to your Pets: We cannot stress enough the need to start SLOWLY. And we mean VERY slowly. Kefir is a very potent probiotic, with many substances your pet has never consumed. Dosage: Give a teaspoon to a tablespoon of kefir to small cats or small dogs a day. Medium size dogs – 1 – 2 tbsp. Large dogs – 2 – 3 tbsp. ***Cats specially: Start with 1/8 tsp, and increase every FEW days by doubling the amounts. Give your cat only 1/2 of the dosage for at least one to two weeks before increasing to 3/4 and so on. If your cat has any reactions to Kefir, you can try two things: 1- Do a double fermentation - still reacted? 2- Change the milk for goat milk - still reacted? Stop giving it. I personally had a cat react to kefir, to both Regular Cow's milk and Raw goat milk. I am giving him a break and will try a very slow introduction later on. My other cat seemed to react when I increased the kefir to 1/2 tsp per meal, however the problem was solved with a slower introduction, and a double fermentation. She is also ok with Goat Milk Kefir. I have substituted my cats', mine and my dog's store bought probiotic for Kefir, and everyone is doing terrific! Kefir has been the perfect addition to the kitties' EZComplete diet - how would it not be with so many wonderful properties? YES! Pork is a wonderful meat for cats. Most cats both love pork and do very well with it. At Food Fur Life and in our Raw Feeding for IBD Cats group we often recommend pork loin as a starter meat when introducing raw food to cats. For many it is essentially a “novel” protein. Of course it should be introduced properly and slowly as with any new food or new protein in a raw diet. An excellent source of taurine, pork is a healthy addition to any homemade food protein rotation (though we'd like to note the more electrically active muscles will always have much higher concentrations, e.g. tongue, lung, heart and the dark meats - in pork, being the shoulder). The most maligned meat, many of the myths and misconceptions surrounding the feeding of raw pork are simply outright misinformation; others are outdated health concerns. Let’s address those myths and fears. They are:
Of course, when we say pork is a wonderful raw meat for cats, we do not mean bacon or ham. Salted or smoked meats should never be fed to any pet, due to the sodium content, smoke flavoring chemicals, nitrates and potentially preservatives. But cuts of pork meat: loin, boneless rib meat, butt, shoulder – these are all excellent sources of protein and should be welcomed in any healthy meat rotation in a raw diet. With moderate fat, and low in saturated fats compared to other red meats, pork truly is “the other white meat.” So put your fears aside, and let your kitty enjoy this nutritious protein in its natural state. Let’s face it - very few humans would intentionally choose to eat only dry cereal or only canned stew, even if they were designed to meet all of our daily nutritional requirements. No matter what flavorings were added, most of us would, at some point, crave an apple, a fresh juicy peach or pear, or a cold, crisp salad. Many of us badger ourselves to eat better, and we strive to eat more fresh foods - or at least just not eat as many convenience foods. And if we don’t? Our doctors encourage us to eat more fresh food. We know the more fresh food we include in our diet, the healthier we are, the more energy we have, and the better we feel. We also know that even if we had a power bar for breakfast and fast food for lunch, if we have an apple as a snack, it is better than not eating that apple at all. The same holds true for our cats. Some fresh meat is better than none! Kibble and canned food for cats is convenient. That's what it is for. Our convenience. Just like bagged or canned foods for humans are called "convenience foods." And convenience foods are not the healthiest food choices for us. Just as convenience foods are not the healthiest choices for our cats. But we lead busy lives, and convenience foods make feeding our pets quick and easy; even though it's not what is best for them. And we know this. But when considering a healthier diet for our cats, most of us got – or get – overwhelmed. It is… Too difficult Too time-consuming Too expensive And some of us get to the point of almost hyperventilating by the time we’re wondering things like What meat do I buy? Where do I buy it? How do I store it? Do I need more freezer space? How do I make sure I get it right? Am I going to harm my cat????????? But you know what? It doesn’t have to be all or nothing. At least at first. You don’t have to commit to feeding your cat only homemade food right off the bat. ANY amount of fresh meat you add to your cat's diet is better than none. No need to fret at all. You can start really small. Baby steps! (Even just a slice of apple is better for you than none at all!) If you’re not a vegetarian, and you make meat-based dishes for your family, you’ve already got everything you need to start. Next time you make a meal with meat, just slice off a little bit before you season it. That’s all there is to it to get started! It really IS that simple. You’re holding a tasty, healthy treat for your kitty. When is plain meat is no longer a treat? When the amount you’re giving your cat approaches 10% of the total diet. When it's more than 2 or 3 bits of meat treat a day. Yes, at that point you need to balance that meat to make it a nutritionally complete food. You might want to consider Food Fur Life as a solution for that. EZcomplete fur Cats makes that part quick, easy, and worry-free, allowing you to prepare balanced and complete homemade raw meals in a few simple steps. But please know that even if you’ve moved to balancing the meat, you still don’t have to commit to feeding it full time right away. One meal a week? Two? Three? In fact, we expect that no matter how much you’re able to incorporate, you’ll want to find ways to include more. You’ll see the difference. No matter how little or how much, fresh food will benefit your cat. At that point, feeding more homemade food won't seem so overwhelming. And with the ability to use the supplement with chunks or ground, and to make the food with more water for gravy – or with just a bit of water to make it stick to the meat – your complete and balanced nutritionally complete food made with EZcomplete is actually ideal for snack-style or intermittent feeding. If you’ve been considering ways to improve your kitty’s diet, there’s no reason not to just jump right in. No logistics needed. As Dr. Lisa Pierson’s Andy says on catinfo.org … 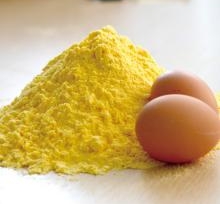
For those concerned about chicken allergies, it's important to note that the body sees chicken muscle meat and egg yolk as two different proteins. A chicken allergy does not mean your kitty is also allergic to egg yolk!
As discussed in our article Hairballs: How Best to Manage Them, often the butt of jokes, hairballs are a sign the stomach of our kitties is not emptying properly. This is a problem with motility, a problem that can lead to or be a symptom of inflammatory bowel disease and/or small cell intestinal cancer. Hairballs are no laughing matter. Proper management of hairballs involves
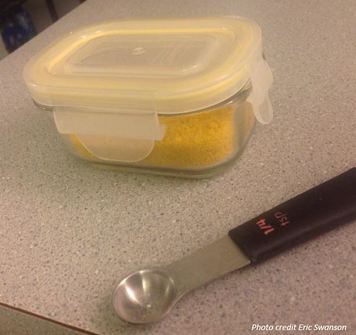
In that article, we outline why egg yolk and egg yolk lecithin are the first, best methods for managing hairballs in our cats when help is needed. Since writing that article, however, we’ve found that some kitties do not enjoy the additional raw yolk (Please note, food made with EZcomplete fur Cats already contains egg yolk - and most raw or homemade diets also already contain egg yolk, which provides many essential nutrients), and some IBD cats sensitive to fats in the diet cannot tolerate as much egg yolk lecithin as they actually need to resolve hairballs. Food Fur Life co-founder, Carolina, discovered that using powdered egg yolk instead of additional fresh egg yolk made it not only enjoyable for her cats to eat – she no longer needed to give them egg yolk lecithin! (And Carolina has four long-haired rescue kitties, two with IBD). Hairballs, not surprisingly, are a frequent topic of discussion in the Raw Feeding for IBD Cats Facebook group. And we’re finding this approach is helping other cats as well. Group member Eric Swanson decided to make his own homemade powdered, dried egg yolk – and it was both a success and a hit with the cats! How much dried, powdered egg yolk to feed? START SMALL or your cat may experience loose stool or diarrhea. As with all new supplements, it is always best to start with a much smaller amount than you intend to use: make sure your cat does not react to the new addition. Start with a pinch of dried powdered yolk on one meal. Day two, try a big pinch. Day three, use 1/8th teaspoon every-other-day, and work up slowly from there. You can work up to as much as one-quarter yolk a day if needed (in addition to what is provided by the diet), but as always, it is best to use the minimum amount necessary to “get the job done.” Egg yolk in the diet provides many health benefits apart from aiding in hairball management (the egg is a powerhouse of nutrition!) and this amount of egg yolk will not throw the diet out of balance no matter what food you feed. For those with cats with Chronic Kidney Disease, one large egg yolk (which, at 1/4 yolk equivalent a day results in the addition of one yolk every four days) contains the same amount of phosphorus as one ounce of muscle meat. This should not be enough to need to adjust the phosphorus binder you are using if you're using one, but you may want to discuss this with your vet. Recipe / Instructions for Making Homemade Dried, Powdered Egg Yolk Courtesy of Eric Swanson. Photos preparing dried yolk, also thanks to Eric! Use the highest quality eggs you can. Eggs from organically fed, pastured chickens is obviously ideal, but not necessary. 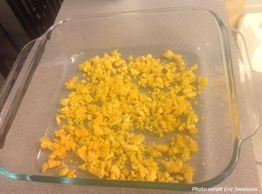
Eric started with four egg yolks. This recipe works for as many as you care to make.
1) Hard boil the eggs. (Gently lower eggs into boiling water, and boil on medium heat for 12 minutes) 2) When done, run the hard boiled eggs under cold water. 3) When cool, peel the eggshell. (If you make your own eggshell as a calcium source in your cat’s food, save the peeled shells!) 4) Crumble the yolk in a single layer onto a baking pan or into a baking dish. Eric used a Pyrex glass bakeware dish. 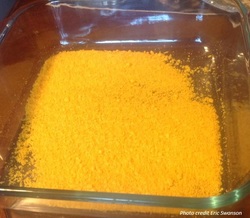
5) Bake at 140F (60C) for 10 hours. If the lowest temperature on your oven is 170F (75C), that's fine, use that and check the yolks after 9 hours to see if they appear to be completely dry. You can stir the yolk after 4 or 5 hours, but it isn't necessary.
6) Remove from the oven (leave it on) and powder the yolk in a food processor or blender. If the yolk is completely dry, you're done! If it feels a tad moist, or a bit "tacky," then 7) Put the now powdered yolk back on the baking sheet / baking dish. 8) Cook the now powdered yolk for up to another two hours so it dries completely. Store in a glass jar in the refrigerator, or a cool, dark place. Four large fresh egg yolks yielded approximately 11.5 teaspoons of powdered yolk (approximately four tablespoons). In this example, one tablespoon of dried yolk powder is the (approximate) equivalent of one large fresh egg yolk. Depending on how fine your processor makes the powder, you may have different results, so it is best you measure the amount of final dried yolk powder to determine how much powder equates to one fresh egg yolk. We recommend feeding up to one-quarter yolk per day, though this amount may not be necessary for all cats. If hairballs do not resolve at that amount, other steps should be taken rather than feeding more powdered egg yolk. You can, of course, purchase commercially prepared powdered, dried egg yolk (not whole egg). Please check for flow agents, many dried powdered egg yolks use them, and it is better to avoid them if possible. Also make sure you know what the fresh yolk equivalent is of the powder you purchase so you can feed the correct amount to your cat, as the fresh yolk equivalent of commercial powders ranges from one teaspoon to one or two tablespoons.
Feeding multiple cats with EZComplete is easy!
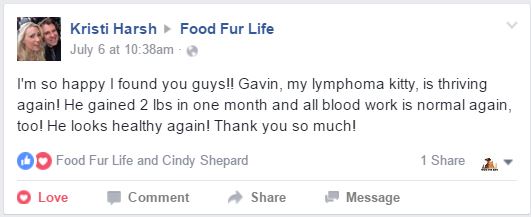
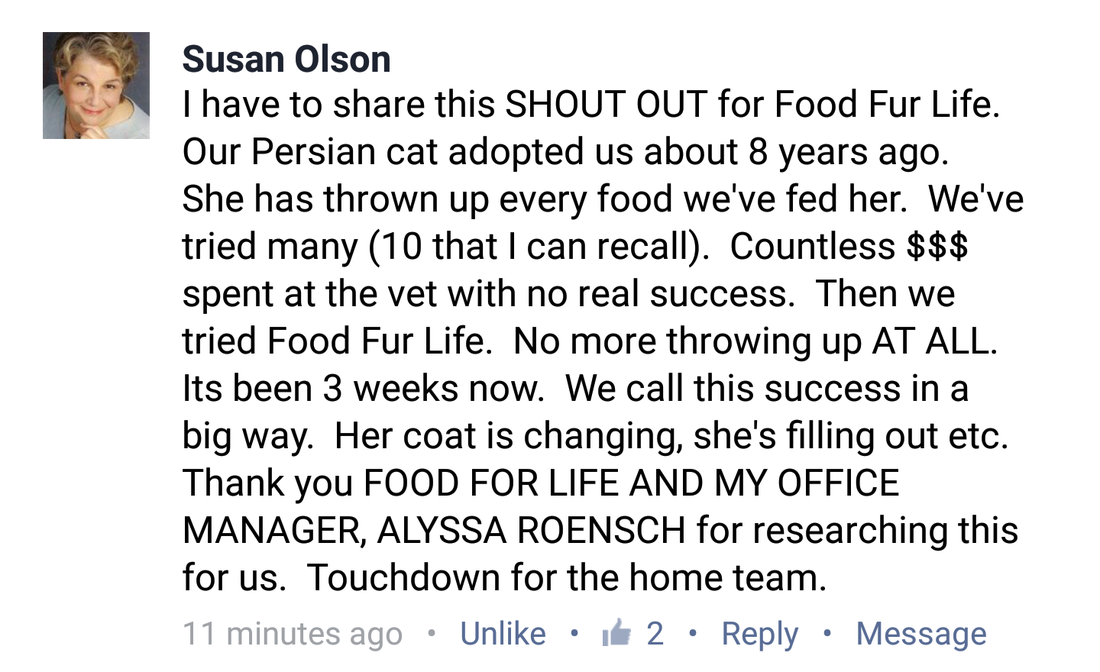
I made a little video of how I make my "meal batches". I don't freeze my batches, but you can if you prefer... Just remember to do so ***before adding probiotics*** This is not a fancy video... It's just a video of our daily feeding routine :D To calculate the amount of powder for any quantity, multiply the Meat weight in Oz x 2.5 and divide by 1.5. On this case: 13.5oz*2.5/1.5=22.5g Also - you don't need to add extra Egg Yolks to EZComplete - I only do it during hairball season as my cats are all very long haired and with two suffering from IBD, they have a hard time during this time of the year. You can read more about how to manage hairballs in this article. Hope this is helpful! Carolina The review below was posted on our Facebook page by a very satisfied customer who for many years tried to help her little baby anyway she could for no avail. It fills our hearts to know EZComplete helps kitties like Susan's when nothing else would. THAT is why we created Food Fur Life - THAT makes it all worth it! <3 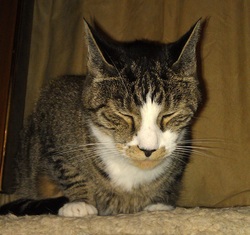
Why to Transition Slowly
If you introduce any new food too quickly, your cat may have diarrhea, constipation, vomit, or can even become lethargic due to GI distress. You’ll take your cat to the vet. If your vet is anti-raw, as so many are, they will blame the food. And they will be right – for the wrong reasons. This is not salmonella. This is kitty being transitioned too quickly. If you’ve fed your cat kibble, did you ever read the bag? The advice is to transition your cat to the new food over 7 to 10 days: mix just a small amount of the new food into the existing food, and slowly increase the amount of new food and reduce the old food by a like amount. Rapid transitions cause GI upset. This is no different. The process of introducing food made with EZcomplete, no matter how much your cat likes it, should be similar. While kitty enjoying the new food is wonderful, and makes the process much easier (!!), a transition that is too rapid will usually make your cat not feel well. Even if your cat is not new to raw feeding, your kitty may be new to some of the ingredients in EZcomplete fur Cats. The supplement contains New Zealand Green Lipped Mussel Powder – many cats have never had this before. The supplement contains plant-based enzymes – many cats have never been given enzymes before. If a cat is new to raw of home cooked, then almost ALL of the ingredients, including the raw or cooked meat, will be new (human grade meat is not the same as pet grade)! How to Transition Slowly The rule of thumb is very simple: Start small. Go Slow. Problems? Back up, slow down. With this in mind, do NOT start by making a big batch of food. Make just one meal. Store it in a baggie or container in the fridge. If you plan to give ground food to your kitty, use 1.5 ounces (43g) of ground (boneless) meat. Add one scoop of EZcomplete fur Cats and water to the consistency you want the food. If you plan to make chunked food, cut up 1.5 ounces (43g) of (boneless) meat into small slivers. Add one scoop of EZcomplete fur Cats and water to make the supplement stick to the meat. You can add more water when you serve it if you want there to be a bit of gravy. Make additional single meals with that same protein as needed during this transition. The First Meal(s) Start small, increase slowly day-by-day, NOT meal-by-meal. If there is any vomiting, back up, give a one or two day break, and start even smaller. If there is any diarrhea, back up, give a one or two day break, and start even smaller. If your kitty “meatloafs” in discomfort after a meal, or if your kitty is lethargic, or not acting normal in any way, back up, give a one or two day break, and start even smaller.
For Subsequent Meal(s)
Keep your eye on the litterbox and be aware of your cat’s behavior. If there is any vomiting or diarrhea, any signs of nausea, back up to the amount you last used before there was a problem. Stay there for two days, and then increase the amount of new food by one-quarter teaspoon, instead of one-half teaspoon. Day One Method 1: mix ONE-HALF teaspoon into your cat’s existing food. Method 2: place ONE-HALF teaspoon in the same dish as your cat’s existing food. You can reduce the amount of other food by one-half teaspoon. Feed just one-half teaspoon of the new food with existing meals for the first day. If you do not start in the morning, use that amount for all of the meals the following day. Day Two If kitty did well the first day with one-half teaspoon, increase the amount of new food from one-half teaspoon to one teaspoon at each meal. Days Three and Beyond Increase the amount of new food by one-half teaspoon each day (decreasing the old food by the same amount) – NOT each meal – until your kitty is eating meals that are 100% food made with EZcomplete. Again, use only one protein until they are eating 100% EZcomplete. If at any point your kitty has a reaction to the new food, back up, slow down. Again, make additional SINGLE meals as need. Continue to use the same protein until your kitty is eating 100% new food (EZcomplete). To Add a New Protein Use food made with that first protein and EZcomplete to introduce a second protein into the kitty’s diet. Repeat the process you just went through introducing food made with EZcomplete and the former meat/protein, but using food made with the second protein being introduced into the food your kitty is successfully eating at 100% with the first protein you just introduced. Follow the same process until your kitty is eating food made 100% with the second protein. Now you can rotate between those two. Use them to introduce (using the same, slow process) a third protein, &etc. For example: If you introduced Chicken with EZcomplete first, use that as a “Base” to introduce a second protein into the diet – let’s say you now want to introduce Pork + EZcomplete as the second protein. Once your cat is eating 100% Chicken + EZcomplete, that is the “old food,” and “Pork + EZcomplete” is now the new food, being introduced slowly. Simply follow the same guidelines explained above. Why not Start with Large Batches? Raw food is NOT at all like canned food. This is a minimally processed food, and it must be thought of as you would if you were transitioning yourself as an adult from never having ever eaten any fresh fruit or salad to a diet that is only fresh fruit or salad. Your body will most likely freak out if you switch all at once. You must give your GI system time to adjust to it. Imagine if you are a vegan and all of a sudden you eat an all-you-can-eat BBQ – how would you feel? Yes – you’ll feel like you ate a brick, and most likely quite sick! It is the same for our kitties, and if you transition too quickly, you simply have to expect problems – which is why we recommend a slow, controlled transition. You need to determine which protein your cat likes and does well with, in that small amount, before continuing. If you had been eating only all dry cereal or canned stew, if transitioning to an all fresh fruit diet, you may not do well with oranges or pineapple, but you may do well with apples. When you’re stable on apples, then you can try adding pear. The process with our cats and the new raw or homecooked food must be thought of in the same way. Start small. Go slow. Problems? Back up, slow down. This blog post has been added as an article in the How To section of the website. |
Archives
August 2021
Categories
All

|







 RSS Feed